Welcome to your go-to guide for using concrete for pavers in NZ. Whether you’re planning a new driveway, patio, or garden path, choosing the right concrete base can make or break the result. With so many options and techniques out there, it’s easy to feel overwhelmed. This post breaks everything down into simple, clear steps, covering the best types of concrete, how to lay pavers properly, common mistakes to avoid, and what it all costs in New Zealand. If you’re after a long-lasting, low-maintenance surface that looks great year-round, you’re in the right place.
The best concrete for pavers in NZ is a high-strength ready-mix concrete with a stable base layer like compacted AP20 gravel. This combination ensures durability, proper drainage, and long-term performance for driveways, patios, and paths. Choose mortar or sand bedding depending on your project type and always prepare the base correctly to avoid shifting or cracking.
Table of Contents
What Are Concrete Pavers?
Concrete pavers are pre-formed paving units made from a concrete mix that’s poured into a mold, compacted, and cured. They’re designed to be strong, weather-resistant, and versatile, making them a go-to option for driveways, patios, walkways, and commercial outdoor spaces across New Zealand. These pavers come in various shapes, sizes, textures, and colours, giving property owners the flexibility to create modern, rustic, or classic outdoor looks.
Unlike poured concrete, which is installed as a single slab and hardens in place, concrete pavers are individual units. They’re laid over a prepared base, often gravel and sand, and can be arranged in different patterns. This makes repairs easier. If one paver cracks or shifts, you can replace it without redoing the entire surface.
Another key difference lies in durability and maintenance. Poured concrete is more prone to cracking over time, especially with ground movement or extreme weather. Concrete pavers, on the other hand, are designed with joint spacing, allowing them to move slightly without cracking. This makes them a better choice for high-traffic areas and long-term performance.
In New Zealand, concrete pavers are widely used in residential gardens, outdoor entertaining areas, and driveways. In commercial settings, you’ll see them in car parks, pedestrian paths, and public courtyards. Their visual appeal and ease of maintenance make them a popular alternative to plain concrete slabs, especially for property owners who want both function and design.
If you’re deciding between pavers vs concrete slab, think about your goals, pavers offer style and flexibility, while slabs may cost less upfront but often require more maintenance over time. For lasting results in NZ’s changing climate, concrete pavers NZ projects often provide better value in the long run.

Why Use Concrete For Pavers?
Concrete is one of the most reliable materials used for paving projects in New Zealand. It’s not just a practical choice, it’s a smart one that offers long-term value. From handling tough weather to carrying the weight of vehicles, concrete performs where it counts. If you’re planning to install a new driveway, patio, or pathway, here’s why concrete should be your go-to base and surface material.
Strength That Holds Up In New Zealand Conditions
New Zealand’s climate varies across regions, but one thing is constant, outdoor surfaces take a beating. Concrete pavers offer exceptional strength that can handle heavy rain, direct sunlight, frost, and even coastal air. Whether you live in Auckland, Christchurch, or Queenstown, concrete stands up to the challenge.
When installed properly, concrete pavers can also support the weight of cars, trailers, or even work trucks. This makes them an ideal choice for driveways or high-traffic areas where durability matters. Compared to other materials like gravel or basic bricks, concrete is far more reliable in terms of structural performance.
Low Maintenance That Saves You Time
One of the biggest advantages of using concrete for pavers is the low maintenance requirement. Once installed, you won’t have to deal with constant repairs or touch-ups. Occasional cleaning and resealing every few years is often all it takes to keep your surface looking good and functioning well.
Weeds don’t grow easily between properly set concrete pavers, and the surface resists oil stains and water damage better than porous options. You won’t need to worry about uneven settling or shifting if your base is correctly compacted and prepared.
Versatility That Matches Any Style
Concrete pavers are available in a wide range of shapes, textures, and finishes. Whether you want a modern, clean-lined patio or a more rustic, natural look, you’ll find a style that fits. They can be colored, stamped, or textured to mimic stone, brick, or even timber, without the same upkeep requirements.
This design flexibility means you can match your concrete pavers to the look of your home or garden. It’s a practical option that doesn’t force you to sacrifice style for performance.
Real-World Example: A Kiwi Driveway That Lasts
Let’s say a family in Hamilton wants to upgrade their old gravel driveway. They’re tired of loose stones, muddy tire tracks in winter, and regular maintenance. By switching to concrete pavers laid over a solid base, they get a smooth, level surface that handles the weight of their two vehicles year-round.
They choose square grey concrete pavers with a sealed finish. The surface is easy to clean, doesn’t crack under pressure, and blends well with their outdoor design. Five years on, the driveway still looks and performs like new, with no major repairs needed.
This is the kind of long-term benefit concrete offers when used right.
If you want the best concrete for pavers that’s built to last in NZ conditions, you can’t go wrong with this material. It delivers durable paving NZ homeowners can rely on, both for function and style. Whether it’s a driveway, walkway, or patio, concrete gives you peace of mind and long-term value.

Choosing The Right Type Of Concrete
When it comes to laying pavers in New Zealand, selecting the right type of concrete is one of the most important decisions you’ll make. Not all concrete mixes are created equal. The right choice depends on your project size, surface load, and how long you want the results to last. Here’s a closer look at the most commonly used options and how to choose what works best for your needs.
Ready-Mix Concrete: Easy And Reliable For Most Homeowners
Ready-mix concrete is the most popular option for residential paving projects. It’s pre-measured, professionally mixed, and delivered straight to your site, saving you time and reducing the risk of a bad mix. For driveways, patios, or walkways, ready-mix concrete offers consistent strength and quality, especially when poured over a well-compacted base.
Many NZ homeowners choose ready-mix because it’s easy to schedule, requires less on-site labour, and is reliable even if you’re working with tight deadlines. If you’re not confident mixing on your own or need concrete for a medium to large area, ready-mix is a safe and practical option.
Mortar Mix Vs. Sand Mix: Know Where Each One Belongs
Mortar mix and sand mix both play specific roles in laying concrete pavers.
- Mortar Mix: Ideal when you need a solid bond between the pavers and the base. It’s commonly used when laying pavers over an existing concrete slab. Mortar provides stability and reduces movement, making it suitable for heavy-use areas like driveways or entranceways.
- Sand Mix (Sharp Sand or Bedding Sand): Better for dry-lay paver installations. It allows for minor adjustments during installation and makes replacing individual pavers easier. Sand bedding is often used for garden paths or decorative patio areas that don’t bear much weight.
The key is to match the mix to the function of the paved area. If your pavers need to carry weight or stay firmly in place, mortar is the better choice. For more flexible layouts and easier maintenance, go with sand.
High-Strength Concrete: Best For Heavy Traffic Areas
If you’re planning to install pavers on a driveway or any space that sees regular vehicle traffic, high-strength concrete is a must. These mixes usually have a strength rating of 25 MPa or higher. They’re designed to withstand heavier loads without cracking or shifting over time.
In NZ, this type of concrete is often used under large format pavers or in commercial settings. But for homeowners who want a long-lasting driveway or parking area, it’s a smart upgrade. It might cost a bit more up front, but it reduces maintenance and improves durability.
How To Match Concrete Type To Project Size And Use
Here’s a simple guide to help you pick the right concrete mix:
- Garden paths or light foot traffic: Bedding sand over compacted base course with pavers laid dry
- Patios or outdoor entertaining areas: Ready-mix concrete base with sand or mortar bedding
- Driveways or carports: High-strength concrete base with mortar-bedded pavers
- Sloped areas or retaining edges: Use mortar to secure pavers and reduce shifting
Before placing an order, always measure your project area carefully and estimate the load the surface will handle.
Ask Your Supplier For Local Advice
Concrete mixes can vary by region in NZ based on local materials and climate. What works well in Auckland might not perform the same in Christchurch. That’s why it’s smart to speak with your local supplier or builder’s merchant. They’ll help you choose a concrete mix that’s suitable for your project, climate, and timeline.
When asking about the best concrete mix for pavers in NZ, give them details like:
- The size and location of your project
- What the area will be used for
- Whether the base will be new or existing concrete
With the right advice and mix, your concrete base will support your pavers for years to come.
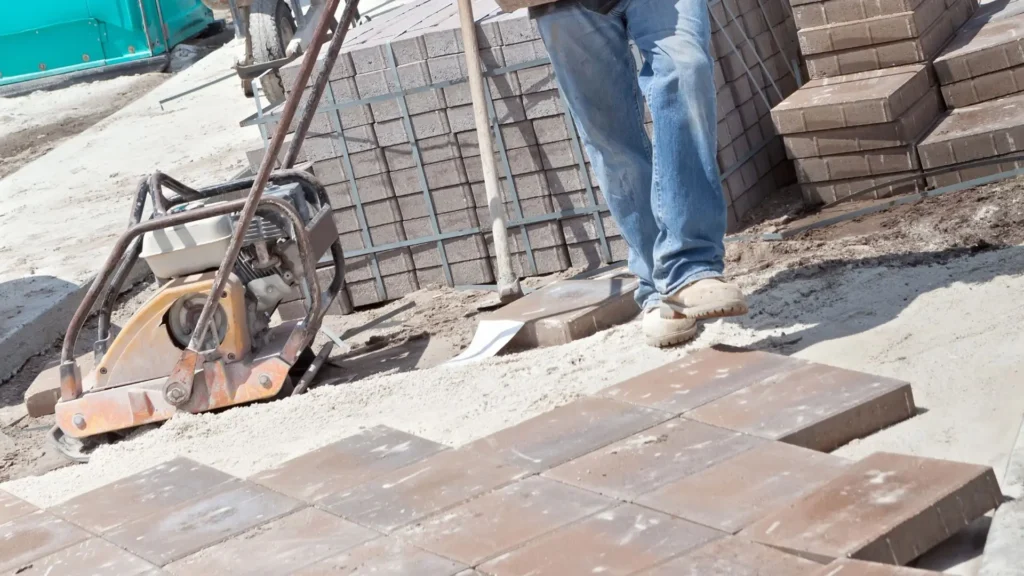
Base Preparation: Why It Matters
If you want your pavers to stay level, last long, and handle New Zealand’s changing weather, it all starts with the base. A poorly prepared base is one of the main reasons pavers shift, sink, or crack over time. It might look flat when finished, but without the right support underneath, your paved area can easily turn uneven after a few months of foot traffic, rainfall, or temperature changes.
Why A Strong Base Is Non-Negotiable
Think of the base as the foundation of your entire project. Just like a house needs solid footings, pavers need a well-prepared base to prevent movement and wear. New Zealand’s climate brings wet winters and dry summers, which means the ground expands and contracts. Without a compacted and stable base, those shifts can quickly ruin your paving job.
Many homeowners try to cut corners by skipping proper excavation or layering, but this usually leads to costly repairs later. Investing time in the base now saves money and stress in the future.
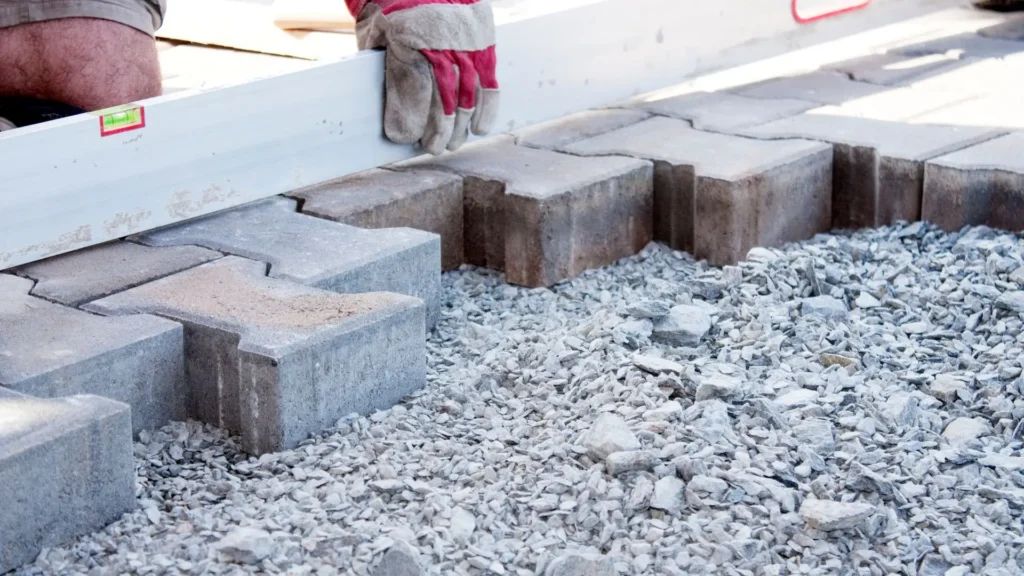
Layer Breakdown For Paver Installation
Here’s a simple breakdown of the layers involved in creating a reliable paver base in NZ:
- Subgrade:
This is the natural soil layer. It must be cleared of grass, roots, and debris. Compacting the subgrade is critical, use a plate compactor to firm it up and avoid future sinking. - Base Course (AP20):
A crushed rock or gravel base (commonly AP20 in NZ) goes on top of the subgrade. This layer, usually 100–150 mm thick, provides strength and allows for drainage. Compact this layer well to avoid soft spots. - Bedding Layer (Sand or Mortar):
This is the thin layer, typically 20–30 mm thick, that sits directly beneath the pavers. Use sharp sand for flexible installations or mortar for rigid setups. This layer allows you to adjust each paver to the right level. - Pavers:
These sit on the bedding layer. Once placed and aligned, you’ll fill the joints with sand or mortar, depending on the type of project.
Common Mistakes NZ Homeowners Make
- Skipping compaction: Uncompacted soil or base layers will settle over time, causing pavers to sink.
- Using the wrong materials: Builders sometimes use soft or recycled gravel instead of AP20, which doesn’t hold up under pressure.
- Poor drainage planning: If water can’t escape, it will pool under the pavers, weakening the base and creating uneven surfaces.
- Ignoring level checks: Even slight variations in slope can cause drainage issues or create tripping hazards.
Simple Site Prep Checklist
Before you lay a single paver, run through this quick checklist to make sure your base is solid:
- Clear the area of all plants, debris, and soft soil
- Compact the subgrade using a plate compactor
- Add 100–150 mm of AP20 gravel as a base layer
- Compact the gravel in multiple passes
- Ensure the base is level with a slight slope for water runoff
- Add a 20–30 mm bedding layer of sharp sand or mortar
- Screed the bedding layer to an even, smooth finish
Following these steps helps you avoid issues like shifting or cracking down the line and gives your pavers a professional finish that lasts.
Laying Pavers On Concrete: Step-By-Step
Laying pavers over concrete in NZ is a reliable option for homeowners looking to create a solid and long-lasting surface. Whether you’re upgrading a tired patio, refreshing a path, or building a driveway, using an existing concrete slab as a base can save time and money. But it has to be done right. Here’s a detailed guide on how to install concrete pavers properly, explained in plain English.
Clean And Prep The Concrete Base
Before anything else, you need a clean surface. Sweep away all debris, dirt, and loose particles. If there’s oil or grease, scrub it off using a degreaser. Wash down the concrete with a pressure washer for best results. Let it dry completely.
- Tip:
Check the slab for cracks or uneven areas. Small cracks can stay, but deep ones should be filled with concrete patch. If the surface is uneven, level it with a self-levelling compound.
Apply A Bonding Agent (If Needed)
If you’re using mortar as the bedding layer, apply a concrete bonding agent to help it stick better. This step is especially helpful for outdoor areas exposed to rain and foot traffic. A bonding agent ensures your mortar doesn’t separate from the slab over time.
- Tip from tradies:
Choose a bonding agent suitable for exterior use. Apply it with a roller or brush in thin, even layers.
Lay Bedding Mortar Or Sand Layer
Now it’s time to set your base. You have two options:
- Mortar bed: Mix a dry mortar (3 parts sand to 1 part cement) and apply a thin 30–40mm layer on top of the concrete. This gives a solid, secure base.
- Sand bed: For lighter footpaths or patios, washed river sand can work. Spread a 20–30mm layer and screed it level.
Important:
Avoid using loose or unwashed sand. It can shift and cause uneven pavers later.
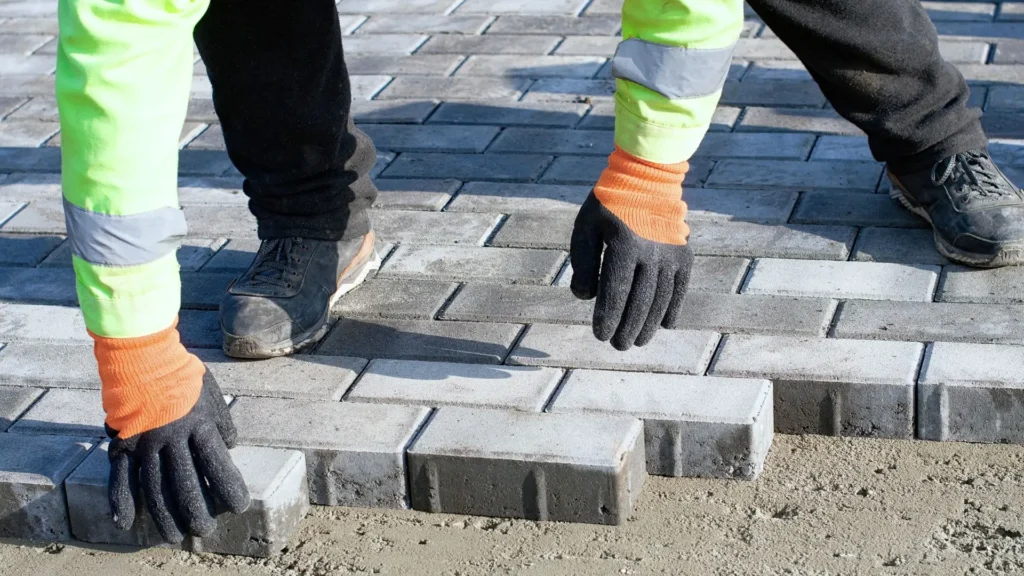
Position The Pavers
Start from one corner or a straight edge. Lay each paver gently onto the bedding layer. Leave small gaps (3–5mm) between each one for joint sand or grout.
Use string lines or spacers to keep everything in line. Don’t rush this part, how straight your first row is will affect the entire job.
- Tip from Kiwi tradies:
Dry-lay the pavers first to test the layout before applying mortar underneath.
Tap Into Place And Level
Use a rubber mallet to tap each paver into place. This helps it settle evenly into the bedding layer. Keep a spirit level handy to check every few rows. Uneven pavers can lead to pooling or trip hazards.
If one paver sits too high, remove it, adjust the base, and place it again.
- Pro tip:
Work in small sections. Don’t try to lay the entire area at once or the bedding may dry out or shift.
Fill Joints With Sand Or Grout
Once all the pavers are set and level, it’s time to fill the joints.
- For sand bedding: Sweep kiln-dried sand into the joints until they’re full. This locks the pavers in place.
- For mortar bedding: Use a grout mix or jointing compound. Apply it with a trowel and sponge off the excess.
Then give the whole surface a final sweep to remove dust and loose material.
Cure And Seal
Let everything settle for at least 24–48 hours before walking on it. If you used mortar or grout, follow the curing time on the packaging, usually 7 days before full use.
After curing, apply a concrete paver sealer. This protects the surface from stains, water damage, and weeds.
- Tip from local installers:
Use a non-slip, UV-resistant sealer for outdoor surfaces. Reapply every 2–3 years for best results.

Cost Of Concrete For Pavers In NZ
When planning a paving project, one of the first questions that comes up is the cost. In New Zealand, the cost of concrete pavers can vary depending on several key factors. Understanding what affects pricing helps you budget more accurately and avoid unexpected surprises.
Average Cost Per m² (Materials + Labour)
On average, concrete pavers in NZ cost between $50 and $100 per square metre for the materials alone. When you include labour, site prep, and installation, the total cost can range from $150 to $250 per square metre. This varies based on location, the complexity of the job, and the type of concrete mix used.
Here’s a quick breakdown:
- Materials only: $50–$100/m²
- Labour and installation: $80–$150/m²
- Total estimated cost: $150–$250/m²
These figures apply to standard residential projects like driveways, patios, and garden paths.
Factors That Affect Pricing
Access To The Site
If your site is hard to reach, such as a backyard with no vehicle access or a sloped area, labour and equipment costs can increase. Contractors may need to use smaller tools or do more manual work, which adds time and cost.
Paver Type
Not all concrete pavers are created equal. Larger format pavers or those with custom finishes cost more. Decorative or textured pavers add style but increase the overall price. Cheaper pavers may save money upfront but may not last as long.
Concrete Mix Used
The strength and quality of the concrete mix impacts the cost. Higher-strength mixes (like 25 MPa or above) are more expensive but necessary for heavy-duty areas like driveways. For footpaths or patios, a basic 20 MPa mix is usually enough and more affordable.
Budget Tips: DIY Vs. Hiring A Contractor
If you’re on a tight budget, DIY installation can reduce your costs. You’ll only need to pay for materials, tools, and any equipment hire. This can bring your total cost down to around $70–$120 per m² if done properly.
But DIY comes with risks:
- Incorrect base preparation can lead to shifting pavers or cracks.
- You may end up spending more on repairs if mistakes happen.
Hiring a contractor ensures:
- The job is done right the first time.
- You get access to better tools and materials.
- The work is often backed by a warranty or guarantee.
If quality and long-term performance matter, hiring a professional is worth considering.
Whether you go the DIY route or hire a tradie, knowing the paver installation prices in NZ helps you make better decisions. Always ask for multiple quotes, check for hidden costs, and make sure the materials and techniques used match your specific needs.

Common Mistakes To Avoid When Installing Pavers In NZ
Installing pavers may seem simple, but there are several common mistakes that can ruin the result, especially if you’re going the DIY route. These errors can lead to uneven surfaces, cracks, weed growth, or drainage issues that cost more to fix later. Whether you’re building a patio, path, or driveway, avoid these common paver problems to ensure your project lasts for years.
Skipping Compaction
One of the biggest DIY paver mistakes in NZ is skipping or rushing the compaction step. Compaction helps create a stable base that supports the weight of the pavers and anything above them, like foot traffic or vehicles. If the base isn’t compacted properly, pavers can shift, sink, or become uneven over time.
Use a plate compactor on each layer of the base, starting from the soil (subgrade), then the base course (usually AP20 or crushed gravel), and finally the bedding layer. Compacting each level thoroughly reduces the chance of future movement and helps the entire structure stay solid.
Using The Wrong Concrete Mix
Not all concrete mixes are created equal. Choosing the wrong type can lead to weak spots, cracking, or fast erosion. Some DIYers grab the cheapest bag of concrete without checking if it suits outdoor paving. For example, a basic mortar mix might work for light garden paths but will fail quickly under a heavy vehicle.
Use a high-strength mix, at least 20 MPa for patios or paths, and 25–30 MPa for driveways. If you’re unsure, ask your local supplier for a mix designed specifically for concrete pavers. This small step can make a big difference in durability.
Not Sealing The Pavers
Sealing is often seen as optional, but it’s a step you shouldn’t skip, especially in New Zealand’s climate, where rain, sun, and frost can take a toll on exposed concrete. Unsealed pavers are more likely to absorb moisture, stain, or develop surface cracks over time.
Applying a quality sealant after installation protects the surface, enhances the color, and helps reduce moss or weed growth in joints. For best results, reseal your pavers every 2 to 3 years, depending on exposure and use.
Poor Drainage Planning
Pavers look great when freshly installed, but poor drainage can cause long-term damage. Without proper water flow, rain can pool, wash away bedding layers, or cause the ground beneath to soften and shift. This results in pavers that lift, sink, or crack.
To avoid these issues, always slope the surface slightly away from buildings or structures, usually a 2% slope works well. Include drainage channels or soak pits where needed. If you’re unsure how to direct water flow, consult a local landscaper or paver installer.
Save Yourself A Headache, Avoid These Mistakes
Taking shortcuts during installation might save time today, but it can lead to major paver problems down the track. Focus on proper prep, use the right materials, and plan for NZ’s changing weather. Your paver project will last longer, look better, and give you fewer issues over time.

Should You DIY Or Hire A Pro?
When it comes to installing concrete pavers in New Zealand, one of the biggest decisions you’ll face is whether to take the DIY route or bring in a professional. Both options have their pros and cons, and what’s right for you depends on your budget, timeline, skill level, and the size of your project.
Pros And Cons Of DIY
DIY paving is a popular option for small jobs like garden paths or patios. It gives you more control, and it can save you a lot on labour costs. For handy homeowners with basic tools and a bit of time, it’s doable, especially with online tutorials and step-by-step guides readily available.
Benefits of DIY:
- Save on labour (can cut costs by 30–50%)
- Work at your own pace
- Learn a new skill and take pride in the result
Drawbacks of DIY:
- Mistakes can be costly (improper base prep, uneven pavers, poor drainage)
- Time-consuming, especially without help
- Physically demanding, digging, lifting, and mixing concrete takes effort
For small decorative areas, DIY is often worth it. But if you’re installing a driveway or a large entertaining space, the risk of poor workmanship can lead to long-term issues like sinking pavers or cracking concrete.
When To Call A Contractor
If your project is large, complex, or structural (like driveways, sloped paths, or areas with heavy foot or vehicle traffic), hiring a contractor is the smarter choice. Pros have the tools, experience, and crew to get the job done faster and to a higher standard.
Hire a contractor if:
- The area is large or on uneven ground
- You need drainage, edging, or excavation
- You’re unsure about concrete mixes or base materials
- You want the job done quickly without cutting corners
A poorly done paving job can cost more to fix than to do properly the first time. Professionals know how to avoid issues like puddling, weed growth between joints, and unstable paver foundations.
What To Look For In A Good Paving Contractor In NZ
Not all tradies are created equal. Before hiring anyone, do your homework.
Here’s what to check:
- Experience: Look for contractors who specialise in concrete or paving work.
- Portfolio: Ask to see photos of recent local projects.
- Reviews: Read feedback from real customers.
- Guarantee: A reliable contractor stands behind their work.
- Quotes: Get at least two to three detailed quotes for comparison.
Avoid vague pricing or contractors who rush the job. A good tradie will walk you through the process, explain the materials they’ll use, and give you a realistic timeline.
Tips For Finding A Local Tradie Through Builderscrack Or NoCowboys
Finding a reliable paving contractor in NZ is easier thanks to local review platforms like Builderscrack and NoCowboys.
Use these platforms to:
- Post your job details and get free quotes
- Check customer reviews and ratings
- Compare services and pricing side by side
- See photos of past work
- Filter by location or job type
Be clear about your budget, timeframe, and expectations when posting. You’ll often receive responses from tradies within 24 hours, and you can choose the one that fits your needs best.
Ready to start your paving project? Visit us to explore quality materials, get expert advice, and make your outdoor space stand out.
FAQs: About Concrete For Pavers In NZ
What type of concrete is best for laying pavers in NZ?
The best concrete is a high-strength ready-mix designed for outdoor use. For driveways or heavy loads, choose mixes rated at least 25 MPa. For patios or paths, 20 MPa is often enough.
Can I lay pavers directly on concrete?
Yes, you can lay pavers on an existing concrete slab using a bonding mortar or a thin sand layer. Just ensure the concrete base is clean, level, and has proper drainage.
Do I need to seal concrete pavers after installation?
Sealing is optional but recommended. It helps protect against stains, moisture, and fading from UV exposure—especially in NZ’s harsh weather conditions.
How thick should the concrete base be under pavers?
A concrete base should be at least 100 mm thick for foot traffic and 125–150 mm for driveways or vehicle use. Always ensure proper compaction and sub-base prep.
What is the cost of concrete pavers in NZ?
Concrete pavers cost between $50–$100 per m², depending on style and quality. Adding labour and base prep can bring total installation to $150–$250 per m².
Can I use mortar or sand for bedding pavers?
Yes, both can be used. Sand is easier for DIY and small projects. Mortar provides a stronger bond and is preferred for heavy loads or precise finishes.
How long does concrete take to cure before laying pavers?
Allow at least 7 days of curing for the concrete base before laying pavers. For full strength, wait 28 days, especially for heavy-use areas like driveways.
Is it cheaper to DIY or hire a paver installer in NZ?
DIY can save on labour, but costs can rise if mistakes are made. Hiring a professional ensures correct prep, drainage, and long-term durability.
How do I prepare the ground before pouring concrete for pavers?
Excavate the area, remove organic material, compact the soil, then add a layer of compacted base course (like AP20). Level the surface before pouring concrete.
When is the best time to install concrete pavers in NZ?
Spring and early summer are ideal due to mild weather. Avoid installing during heavy rain or frosty conditions, which can affect curing and bonding.
Conclusion
Concrete remains one of the most reliable choices for laying pavers in New Zealand thanks to its strength, durability, and ability to handle tough weather. But even the best materials won’t perform well without the right preparation. Taking time to compact the base properly, choosing the right concrete mix, and laying pavers with care all make a big difference in how long your project lasts. If you’re unsure about the mix to use or how to install the pavers, don’t guess, talk to a local expert or contractor. A solid plan and good advice at the start can save you time, money, and stress down the track. With the right prep and technique, your paved area will stay strong and look great for years to come.